Faux Concrete Fireplace- Reveal
Several months ago, I started in on our faux fireplace. I've had dreams of making a fireplace for quite some time and when I stumbled across this brass fireplace surround on Facebook Marketplace, I knew it had to make it into our farmhouse. I had some inspiration photos floating around but didn't know how our final fireplace would look. A lot of this construction was just taking it step by step to see how I liked it visually.
 |
 |
 |
I began with buying the insert. The inside of the brass surround measured 22" across so I search Amazon for a pretty affordable insert and stumbled across this one. Ideally, I think it would be stunning to have a gas fireplace but the 1-3k price range was not in the budget. I liked that this insert came in multiple widths, offered crackling and different flame options. This Amazon insert also offered two settings of heat. We're not relying on this fireplace for heat but more an esthetic visual to anchor this corner of the living room... so please keep that in mind when building your own fireplace (considering I used all paneling in my construction).
 |
 |
Once the insert arrived, I began to draw up the pillars that would flank each side of the fireplace. After some rough measuring, the subtle curved shape began to look perfect. I knew I wanted a pretty wide mantel top so I could decorate each season so I opted for 15" at the top depth. I wanted it to slim down to 12" to allow room for the insert. I made the overall height of the mantel 4'H, which felt right to scale with our 9' ceiling height. After some sketching on some thin plywood, I came up with this design.
 |
 |
Once I had my design sketched, I took our jig saw and cut the shape out. I brought the plank inside and studied how the shape would look. After I felt good about the one plank, I took it back to the panel, traced and cut three more pillar planks out. We clamped the final four panel designs together and Taylor rasped and sanded all the pieces together so they would be an identical match to each other. I then cut about 20- 2x4's to a 10" length- if you want thicker pillars, these 2x4's are what would determine your pillar widths.

The two pillars flank each side of the fireplace. Once I had the pillars standing, I could then design up how I wanted the middle section of the fireplace to look. I knew I wanted my fireplace insert to be a little recessed into the pillars. I opted for cutting several 2x4's to 39" long and began to build the frame for the fireplace to sit into. The 39" length gave a couple inches around the brass surround and I raised our fireplace off the ground 5". I saw several fireplaces that have a small hearth in front but decided I could add one later if I desired.
I used my kreg jig to drill pocket holes so that I could tie the middle 2x4 pieces into the two pillars. Since I was screwing into thin panels, where ever I didn't have another 2x4 to screw into (in the pillar), I sandwiched a random 2x4 so my middle frame wouldn't easily rip out of the panel.

Please keep in mind, that if you plan to build a faux fireplace more for a heat source, you will need to research materials that can withstand the heat. Our fireplace was built for more of a visual attribute so I didn't mind building everything out of thin plywood and 2x4's.
Once all the framing was constructed, we cut the baseboards where the fireplace would settle so it could be flush with the wall. We then found the wall studs and anchored several large screws through the fireplace to the wall. I was then ready to cover the open front with more thin plywood. Taylor cut everything to length and we screwed the panels into the frame. Since we were using thin plywood, it made it easy to bend the wood to the curves of pillar fronts. On top of the mantel, I drilled a small hole for an extension cord to slip through so I could have electric when I needed (like Christmas lights for garlands!).
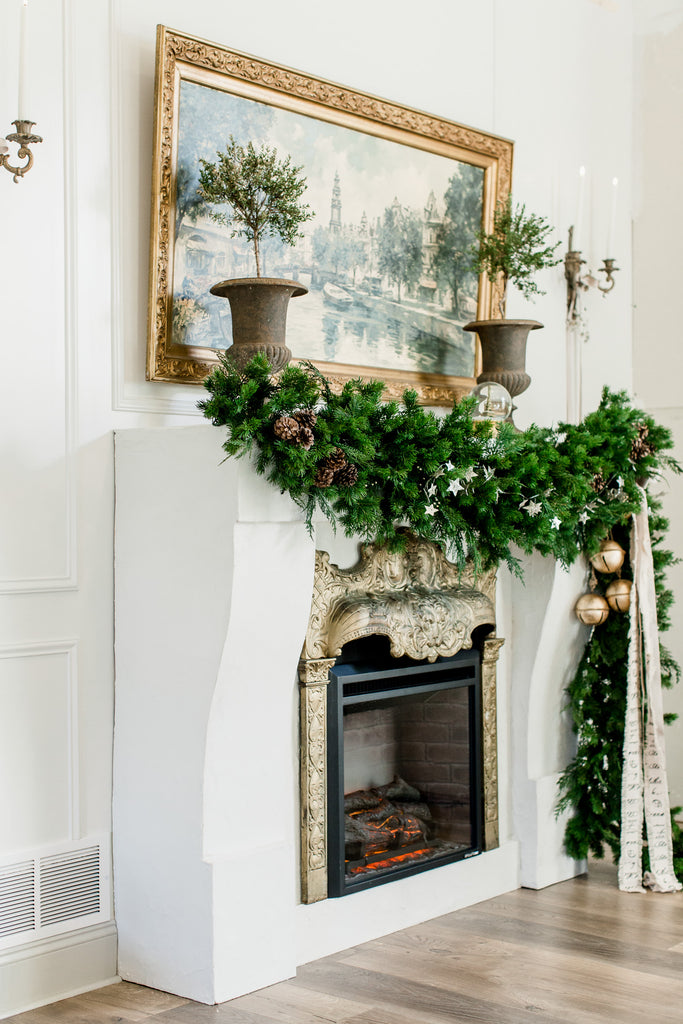
The final step to this construction was covering the entire fireplace with Surecrete. I've used this concrete thin coating in several projects (like our hood range) and knew it would be perfect for the European, old world vibe I was seeking. I grabbed a tile float, mixed up the Surecrete and began smoothing the pancake like mixture to the paneled sides. I love using this product because it covers ALL the imperfect construction details. I layered on a couple thin coats in a smooth stroking finish so that the fireplace would look like one big concrete slab. WOW... it turned out divine!

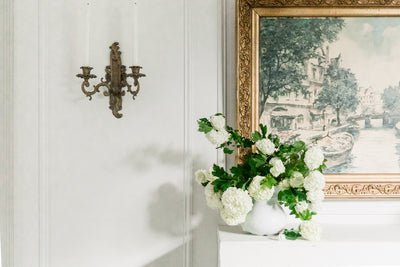
My last finishing detail was the walls. I wanted to add some trim moldings to the walls to elevate this area even more. Once painted, these moldings really brought the whole vision together, especially with the brass candle sconces I found on an antiquing trip. Don't mind the right of the fireplace where I ran out of the trim molding... that'll be finished here soon!
 |
 |

 |
 |
I absolutely adore how this whole project turned out. This little corner of our living room really set the stage for how we want the rest of our chateau farmhouse to feel. For Christmas, I used two of our 9' Evergreen and Cedar Garlands to drape over the mantel. Placing some clustered bells and long ribbons accented the brass touches in the fireplace and sconces. I anchored a large framed art piece that I found last year for the right scale and topped the mantel off with two boxwood topiaries and my favorite Eiffel Tower Snow Globe.

 |
 |


Having this fireplace 95% done feels so great. I can't tell you how much we've enjoyed turning on our faux candle tapers and fireplace in the evenings and early mornings. This whole corner brings so much joy to me and the entire construction was never overwhelming.
Let me know what you think below! Thanks for being here!
Hugs, Alyssa
*blog contains affilate links*


You are so talented and amazing! You made the fireplace project seem easy! It’s so pretty and I love the way you decorated it. Beautiful!
Leave a comment